|
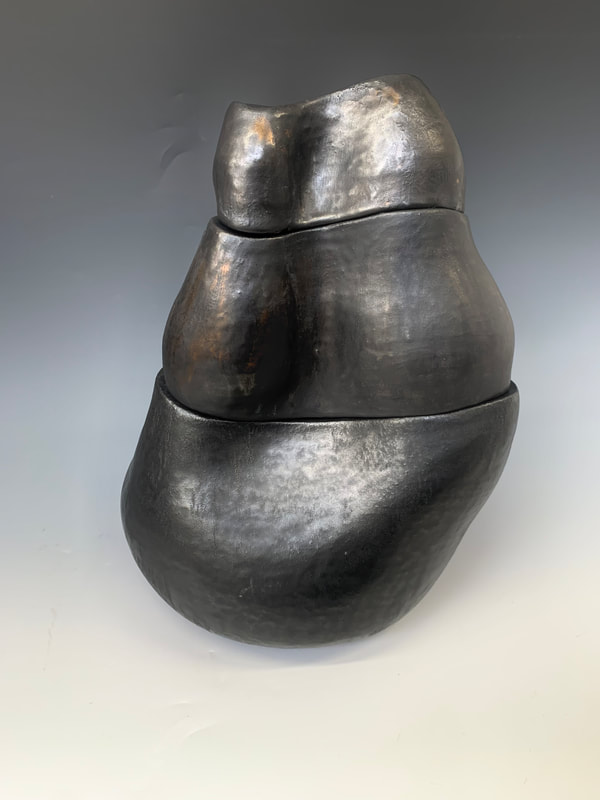
The clay body was slightly darker after the higher firing but I think if I had taken it up to a high stoneware around 1280 degrees centigrade or even considered reduction the colour would have been much richer. I chose to use simple wax to seal the piece. I gave the piece a light sanding and then applied the wax with a cloth, a brush and used a heat gun to apply several layers. `the result was a slightly darker tone and I was pleased with the overall look.
I feel like I have finally made a piece that has something new to say and has lots of potential for development, and I actually like it! Am so pleased to have gotten to this point at the end of my first year, its exciting to look at what’s next now. I plan to look at colour, scale and a myriad of different shapes using this technique. Below is the finished piece I was happy with how the piece had fired and although the pieces were not exactly aligned due to drying/shrinkage issues they were stacking. I wasn’t sure on the exact finish l wanted but knew I didn’t want any colour so I opted for black but wanted to suggest an almost metallic image, with a heaviness to the look of it which would reflect how am feeling about my life right now. So I opted to combine Black Iron Oxide, Manganese Dioxide and some Black copper oxide together, I played about with getting a heavy coating and settled on using an underglaze medium to hold the metal powders in suspension, this made them so much easier to apply evenly.
I was concerned about the potential for them to stick to the kiln shelf and was advised by Cath and Rob that a good coating of alumina on the shelf should be fine. Frustratingly the alumina was forgotten and all three pieces stuck to the kiln shelves resulting in the work having to be chiselled off, each piece is now cracked and damaged. I had chosen to seal the piece with wax so the whole piece needed a light sanding to remove any rough areas left by the oxide coating. This sanding (Under extraction) resulted in a really interesting hammered looking metallic surface which I really liked. Below are images of the pieces before and after firing Delighted it survived the first firing, I knew I needed to explore ideas about colour and finish and want to perhaps look at spraying underglaze. Toni Losey (came across her work at International Ceramics Festival) said that she sprays her pieces and creates an interesting depth of texture through layering underglazes over a number of firings, the coloured surfaces of her work almost look like another sculptural layer. See images below Images of Toni Losey’s work taken by me at International Ceramics Festival 2023I am still planning to explore using underglazes in this way but much experimentation and testing is needed which is what I will explore as my practice progresses. Above are the images of the piece after bisque, I decided to put the piece back in for a stoneware fiirng as I knew the clay body would darken and then make a decision on the finish.
I was excited by the idea of building directly on top of another form to create segments, there were so many potential narratives for this as I was already making anthropomorphic shapes that suggested a torso, I chose to continue this idea with both pieces. It wasn’t quite as straightforward I had first thought because the flat top section of the first section was slightly arced/contoured so it meant creating a base that sat on this and then coiling onto that. There was also the issue of managing the moisture/shrinkage of the clay so the pieces sat more cleanly together, I think in future that I would ensure the templates for the top and bottom joining faces were made quite early on so the size was accurate.
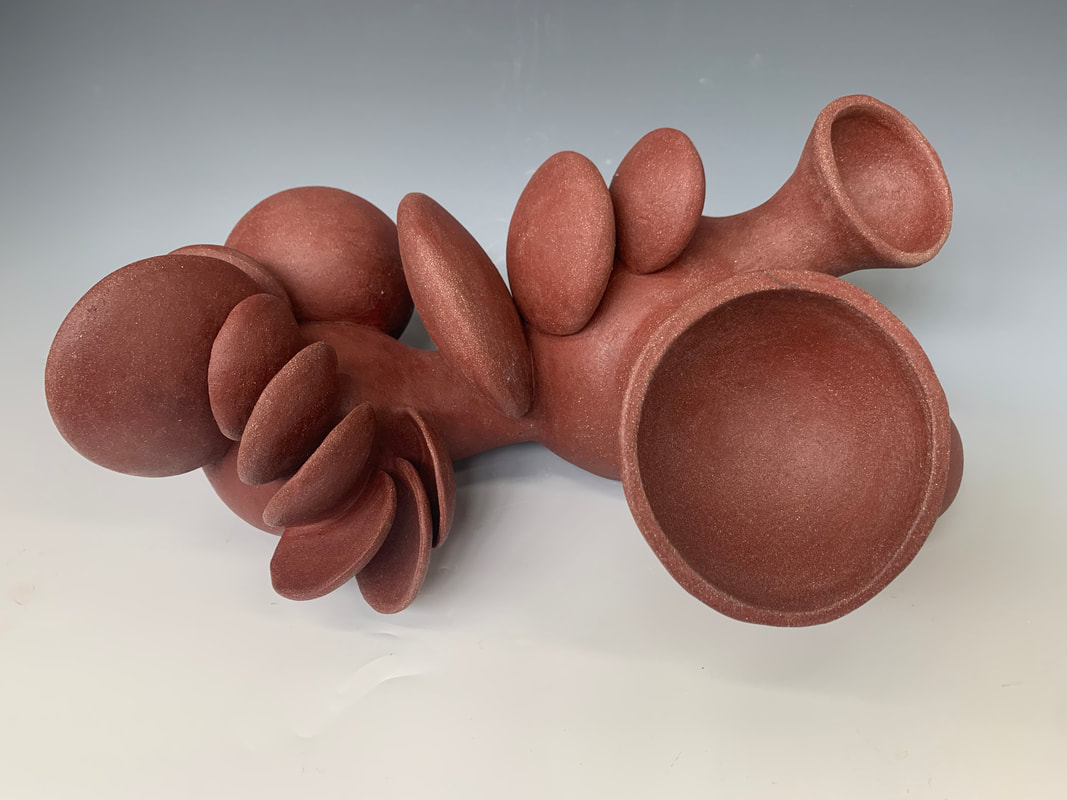
Below are some images of the pieces in progress and after the first bisque firing. I have again used B17C for these pieces but I would definitely opt for a much whiter clay body with more grog in it for future builds. Perhaps using either Ashraf Hanna, or Valentines ES20 which are both grogged but where a smooth surface finish can still be achieved. I kept putting off what to do with the group of red forms I had made, I had them well wrapped and had gotten them out a few times, smoothed and refined them then put them away again, I just didn’t know what the next step was. I knew I needed to just try and stop over thinking the process, I began to mock up some possible shapes and realised I was going to need some way of smoothly connecting the spherical forms to one another, I remembered something from a course I had been on with ceramic artist James Oughtibridge so decided to throw some collars/connectors on the wheel which with a wide top and bottom but a narrower centre would serve as a nice connector between the spherical parts. I was pleased it had worked, I chamfered all the internal edges so the edges would sit neatly, I also cut out curved sections on the ellipses as they were being attached to a curved surface, the result evolved and I had some really helpful critical conversations with my fellow students about the piece which were really helpful. I propped areas with clay wads to enable drying and smoothing in between narrow gaps was tricky but the overall finish was really pleasing.
I love the fact that the piece could be a number of different things, cells under a microscope, macro view of a plant, a weird fungal like structure, I felt the piece had a surreal quality to it. Below are the pics of the piece at the greenware stage, I dried it slowly as I was concerned about potential cracking due to various clay thicknesses involved in the piece. It looks shiny in some of the images as it had been sprayed with water before wrapping. |
AuthorStella Boothman Archives
February 2024
Categories |


 RSS Feed
